





Tired of your “rain shower” feeling more like a leaky watering can, or spraying everything except you? Don’t worry—your bathroom isn’t cursed, it’s just begging for a properly installed adjustable rain shower head.
This guide shows you, step by step, how to install and adjust a rain shower head for perfect coverage, better comfort, and less splashing—backed by plumbing best practices from the U.S. EPA WaterSense showerhead guidelines.
🚿 Benefits of Upgrading to an Adjustable Rain Shower Head
Upgrading to an adjustable rain shower head turns a basic shower into a spa-like experience. You enjoy softer coverage, flexible spray angles, and more relaxing water flow.
Modern models also save water, improve comfort for all family members, and pair well with smart systems like the All-in-One Digital Constant Temperature Shower Combo with Simplified Piano Key - HS-1805.
1. Enhanced Comfort and Coverage
Wide rain spray covers your whole body, reducing cold spots and improving relaxation. Adjustable arms let you set the perfect height and angle for adults and kids.
- Gentle, full-body spray
- Easy angle and height changes
- Great for tall and short users
2. Multiple Spray Modes for Every Mood
Switch between rain, massage, and mixed modes for daily cleaning or deep relaxation. Options feel similar to a spa or high-end hotel shower.
- Soft rain for daily showers
- Massage jet for sore muscles
- Mixed mode for fast rinsing
3. Better Water Efficiency and Control
Many adjustable heads use flow restrictors and smart channels to lower waste. You enjoy strong pressure with less water and lower monthly bills.
| Setting | Use | Water Use |
|---|---|---|
| Eco rain | Daily wash | Low |
| Massage | Target rinse | Medium |
| Full rain | Quick clean | Higher |
4. Flexible Options for Indoor and Outdoor Use
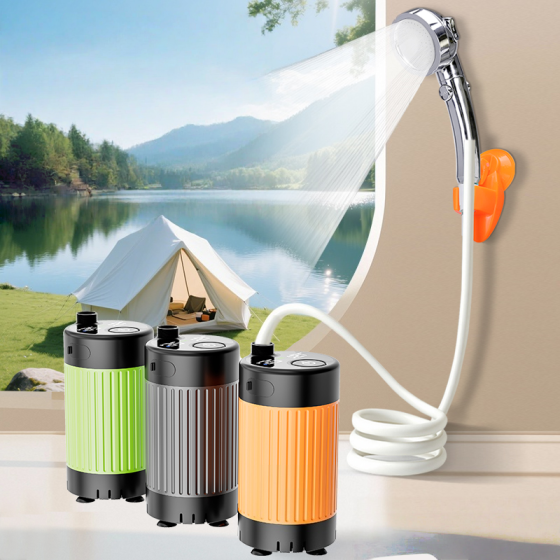
Adjustable rain heads work inside bathrooms and in outdoor setups. Pair one with an ABS, customizable color, outdoor showerhead, three-speed hand spray, portable camping showerhead for travel or garden use.
- Indoor spa feel
- Outdoor rinsing after swimming
- Portable camping comfort
🧰 Tools and Materials Checklist for a Smooth Installation
Preparing the right tools before you start keeps installation fast and stress-free. You reduce leaks, protect fittings, and avoid repeat work.
Most homes only need basic hand tools plus plumber’s tape and a quality unit like a Shower system, 3-mode, space aluminum, bathroom.
1. Basic Hand Tools
Gather simple tools so you do not damage the shower arm while removing the old head and tightening the new one.
- Adjustable wrench or pliers
- Soft cloth or tape to protect finish
- Small step stool if needed
2. Sealing and Protection Materials
Good seals stop drips and protect threads. Use fresh materials instead of reusing old tape or washers.
- Plumber’s (PTFE) tape
- Rubber washer or O-ring (if required)
- Non-scratch cleaning sponge
3. Optional Upgrade Components
Consider extra parts if you want maximum comfort or a full system upgrade in one project.
| Item | Benefit |
|---|---|
| Slide bar | Adjustable height for all users |
| Hand shower | Easy rinsing and cleaning |
| Filter | Helps reduce scale and odor |
4. Data View: Most-Used Installation Tools
Use the chart below as a quick visual guide to which tools DIY users rely on most when installing adjustable rain shower heads.
🔧 Step-by-Step Instructions for Removing the Old Shower Head
Careful removal protects the shower arm and makes installing your new adjustable rain shower head much easier.
Follow these steps to avoid scratches, broken threads, and hidden leaks in the wall.
1. Turn Off Water and Protect Finishes
Turn off the shower valve. Wrap a soft cloth around the old head’s nut so the wrench does not scratch chrome or other finishes.
- Shut the valve fully
- Cover metal with cloth
- Check for movement before force
2. Loosen and Remove the Old Head
Turn the nut counterclockwise with gentle pressure. If it sticks, work slowly instead of forcing it to avoid bending the shower arm.
- Use steady, even force
- Support the arm with your other hand
- Set the old head aside for inspection
3. Clean Threads and Inspect for Damage
Remove old tape and mineral buildup from threads. Check for cracks, wobbling, or corrosion before installing the new shower head.
| Check Item | Action |
|---|---|
| Rust or cracks | Replace arm if severe |
| Old tape | Peel and clean fully |
| Loose arm | Tighten fitting in wall |
🪛 Installing and Securing Your New Wenhai Home Adjustable Rain Shower Head
Once the old head is off, you can mount your new Wenhai Home adjustable rain shower head in a few simple steps.
Work slowly, check for leaks, and adjust the arm so every user enjoys a comfortable height and spray angle.
1. Apply Plumber’s Tape to Threads
Wrap fresh PTFE tape around the shower arm threads two to three times, moving in the same direction you will twist the new head.
- Start at the base of the threads
- Keep layers flat and tight
- Avoid covering the opening
2. Hand-Tighten and Align the Shower Head
Screw the Wenhai Home head onto the arm by hand first. Align the face downward, then lightly snug it with a protected wrench if needed.
- Do not overtighten
- Keep the arm level
- Ensure the swivel joint moves smoothly
3. Test for Leaks and Adjust the Arm
Turn the water on slowly. If you see drips at the joint, tighten slightly. Adjust the arm to center the spray over the shower floor.
| Issue | Fix |
|---|---|
| Small drip | Snug nut 1/8 turn |
| Persistent leak | Remove, re-tape, reinstall |
| Weak spray | Check flow restrictor or blockage |
💦 Adjusting Spray Settings and Maintenance Tips for Long-Term Performance
Proper use and care keep your adjustable rain shower head performing like new for years.
Regular cleaning prevents clogs and helps you enjoy every spray mode at full strength.
1. Using Spray Modes and Angles
Rotate the mode dial to switch from soft rain to stronger massage sprays. Tilt the head so water hits your shoulders or back, not the shower door.
- Test all modes on first use
- Set a default daily mode
- Adjust height for kids and seniors
2. Simple Weekly and Monthly Cleaning
Wipe the face plate weekly with a soft cloth. Each month, soak nozzles in diluted vinegar to break up mineral buildup.
- Never use harsh abrasives
- Rinse well after soaking
- Gently rub rubber nozzles
3. Annual Checkup for Maximum Life
Once a year, inspect joints, washers, and the arm for leaks or wear. Replace low-cost parts before they fail during daily use.
| Part | Check | Action |
|---|---|---|
| Hose (if any) | Cracks, kinks | Replace if stiff |
| Washers | Flattened | Install new set |
| Finish | Spots, scale | Clean with mild soap |
Conclusion
Installing an adjustable rain shower head is a quick upgrade that brings spa-level comfort to any bathroom. With basic tools and careful steps, most homeowners can handle the job themselves.
Keep spray settings tuned to your taste and follow simple cleaning habits. You will enjoy strong, even coverage, lower water waste, and a more relaxing daily shower.
Frequently Asked Questions about adjustable rain shower head
1. Do I need a plumber to install an adjustable rain shower head?
Most people can install one with simple tools in under an hour. Call a plumber only if the shower arm is damaged or leaking inside the wall.
2. Will an adjustable rain shower head work with low water pressure?
Yes, many models use internal channels to boost spray feel. Choose a head designed for low pressure and keep nozzles clean to avoid clogs.
3. How often should I clean my rain shower head?
Wipe it weekly and deep clean with vinegar every one to three months. Homes with hard water may need more frequent cleaning to prevent buildup.
4. Can I use a rain shower head with a handheld shower?
Yes, many systems combine both for flexibility. You can enjoy a ceiling-style rain spray plus a focused hand shower for rinsing and cleaning.
 Privacy settings