





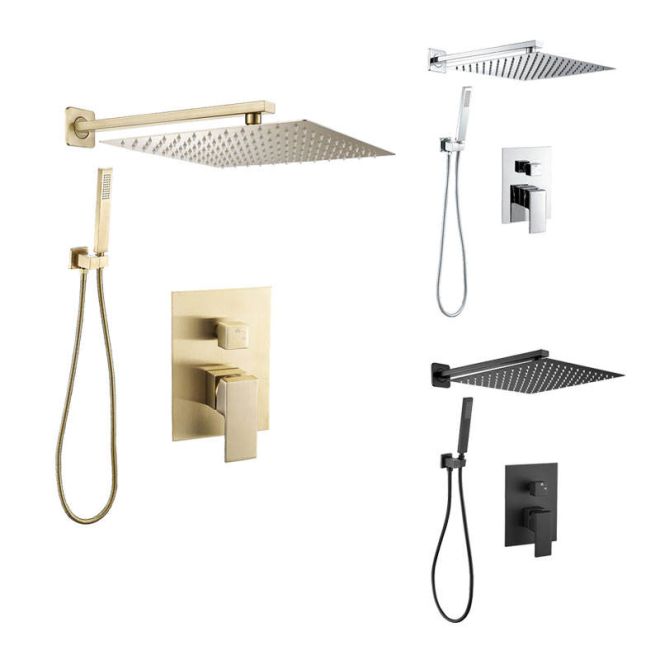
Tired of your shower looking like a plumbing crime scene, with parts everywhere and zero idea what connects where? You’re not alone—most people would rather fight soap scum than decode a full shower kit.
This Ultimate Guide to Full Shower Kit Installation and Setup walks you step by step, from unboxing parts to first test spray, so you can install everything safely and confidently (backed by water-efficiency insights from EPA WaterSense).
🛠️ Planning Your Shower Layout, Measurements, and Plumbing Connections
Plan your full shower kit before drilling a single hole. Good layout, clear measurements, and correct plumbing lines prevent leaks, delays, and costly rework.
Measure twice, then map drain, valve, and showerhead positions. Keep every step simple and follow local building codes for safe, long‑lasting performance.
1. Mapping the Ideal Shower Layout
Place the valve at a comfortable height and keep the showerhead centered. Ensure door swing and enclosure size fit your bathroom traffic and storage needs.
- Valve height: about chest level
- Showerhead height: above tallest user
- Minimum standing space: 32" x 32"
2. Accurate Measuring for Full Kit Components
Measure wall stud spacing, ceiling height, and drain location. Match these to your kit specs so panels, bar, and enclosure align without forced cuts.
| Item | What to Measure |
|---|---|
| Walls | Stud center distance, overall width |
| Floor | Drain to walls, slope direction |
| Ceiling | Height vs. riser bar length |
3. Planning Supply Lines and Valve Position
Use separate hot and cold lines that meet at the mixer valve. Keep the valve reachable from outside the spray path for easy on/off control.
- Follow arrow marks on valve body
- Use shut‑off valves on both supplies
- Pressure‑test lines before closing walls
4. Choosing the Right Shower System Type
Select a kit that matches your water system and lifestyle. For smart control and comfort, consider the All-in-One Digital Constant Temperature Shower Combo with Simplified Piano Key - HS-1805 or the Digital Display Shower System with Piano Keys, Space Aluminum, Wall-Mounted - HS-1818.
🧱 Preparing Walls, Floors, and Waterproofing for Full Shower Kit Installation
Strong walls and waterproof floors protect your home from hidden damage. Prepare the base, studs, and backing before installing any full shower kit parts.
Use approved boards and membranes in wet areas. Seal every joint and corner so water cannot reach wood or drywall behind your new shower.
1. Checking Framing and Wall Flatness
Confirm studs are plumb and flat. Straight framing lets wall panels sit tight, so sealant works well and doors close cleanly without stress.
- Plane or sister bowed studs
- Add blocking for grab bars and valves
- Mark centerlines for easy alignment
2. Installing Backer Board and Floor Base
Use cement board or other approved backer in splash zones. On floors, build a solid, sloped base toward the drain for fast water removal.
| Area | Recommended Material |
|---|---|
| Walls | Cement board or fiber cement |
| Floor | Pre‑formed base or mortar bed |
| Ceiling (steam) | Moisture‑resistant board |
3. Applying Waterproof Membranes and Sealants
Cover seams with tape, then apply liquid or sheet membrane. Seal around the valve, pipe exits, and base edge to create a continuous waterproof shell.
- Overlap corners and seams
- Follow drying times strictly
- Do a light spray test after curing
4. Data Insight: Common Prep Issues and Time Impact
Use simple data to guide your planning. Most delays come from poor framing checks and skipped waterproofing steps, which lead to repairs later.
🔧 Step‑by‑Step Assembly of Valves, Fixtures, and Shower Enclosure Components
Follow a clear order: set the valve, run trim and fixtures, then mount doors and panels. This keeps access open and reduces errors.
1. Mounting and Testing the Mixing Valve
Secure the valve between studs at the marked depth. Connect hot and cold lines, cap outlets, then pressure‑test for leaks before closing the wall.
- Use a level for straight handles
- Wrap threads with PTFE tape
- Flush lines before final trim
2. Installing Showerhead, Hand Shower, and Trim
Fit the escutcheon, handles, and spout first. Then mount the shower arm and slide bar or rail, aligning with wall anchors and backing blocks.
| Part | Key Tip |
|---|---|
| Shower arm | Hand‑tighten, then small wrench turn |
| Hand shower | Use flexible, kink‑free hose |
| Trim plate | Seal top edge only, leave bottom to drain |
3. Assembling Doors and Enclosure Panels
Build the base track level, then install side rails and glass. Add seals, handles, and bumpers to keep water inside and doors moving smoothly.
- Shim under track where needed
- Do not over‑tighten glass clamps
- Run a neat bead of silicone at base
🚿 Adjusting Water Pressure, Temperature Controls, and Showerhead Settings for Comfort
After assembly, fine‑tune water flow and temperature. Proper balancing and smart settings give you a safe, pleasant shower every day.
1. Balancing Water Pressure and Flow
Open angle stops fully, then test all modes. If pressure is high, use built‑in flow limiters; if low, clean screens and check house pressure.
- Target 40–60 psi at the house
- Check for kinks in flexible hoses
- Keep strainers free of debris
2. Setting Safe Maximum Temperature
Adjust the anti‑scald limit on the valve. Let water run, then use a thermometer and set a safe max, often near 38–40°C (100–104°F).
| User | Recommended Max Temp |
|---|---|
| Children | 38°C / 100°F |
| Adults | 40°C / 104°F |
3. Optimizing Spray Modes and Special Features
Test each spray mode and adjust angle and height. For outdoor or mobile use, a kit like the ABS, customizable color, outdoor showerhead, three-speed hand spray, portable camping showerhead offers flexible settings and easy cleaning.
✅ Final Safety Checks, Leak Testing, and Wenhai Home Kit Maintenance Tips
Finish with full leak tests and safety checks. Then follow a simple care plan to keep your Wenhai full shower kit looking and working like new.
1. Leak and Function Testing Checklist
Run all outlets for several minutes while checking behind and under the shower. Inspect joints, valves, and corners for any moisture or drips.
- Check valve body and unions
- Inspect around drain and base edge
- Dry, then recheck after one hour
2. Safety Features and User Comfort
Confirm tempered glass labels, smooth door edges, and solid grab points. Make sure floors are slip‑resistant and lighting clearly reaches controls.
| Item | What to Confirm |
|---|---|
| Glass | Tempered and chip‑free |
| Doors | Close softly, no binding |
| Floor | Anti‑slip texture or mat |
3. Long‑Term Cleaning and Care Schedule
Use mild cleaners on panels and fixtures, and wipe glass after each use. Descale showerheads and flush valves regularly to maintain stable flow and temperature.
- Weekly: wipe walls, clean drain cover
- Monthly: descale showerhead and hand shower
- Yearly: inspect sealant and replace if cracked
Conclusion
A full shower kit offers a fast, clean way to upgrade any bathroom, but success depends on careful planning, strong prep work, and correct assembly.
By checking framing, sealing every surface, and tuning pressure and temperature, you create a safe, comfortable shower space that stays reliable for years.
Frequently Asked Questions about full shower kit
1. Do I need a plumber to install a full shower kit?
If you are moving pipes or lack experience, hire a licensed plumber. For simple replacements on existing lines, skilled DIYers can often handle the job.
2. How long does full shower kit installation usually take?
For most homes, expect two to three days. Day one covers prep and plumbing, day two panels and doors, day three finishing and cure time.
3. Can I install a full shower kit over existing tile?
Only if the tile is solid, flat, and well bonded. Many kits still recommend removing old finishes to inspect framing and add proper waterproofing.
4. How do I know which size shower kit to buy?
Measure wall‑to‑wall and front‑to‑back inside the framed space. Compare these to the manufacturer’s rough‑in and finished sizes, allowing for walls and doors.
5. How often should I reseal or recaulk my shower?
Inspect sealant every year. In busy homes, plan to recaulk high‑stress joints like base‑to‑wall and corners every two to three years or when cracks appear.
 Privacy settings