





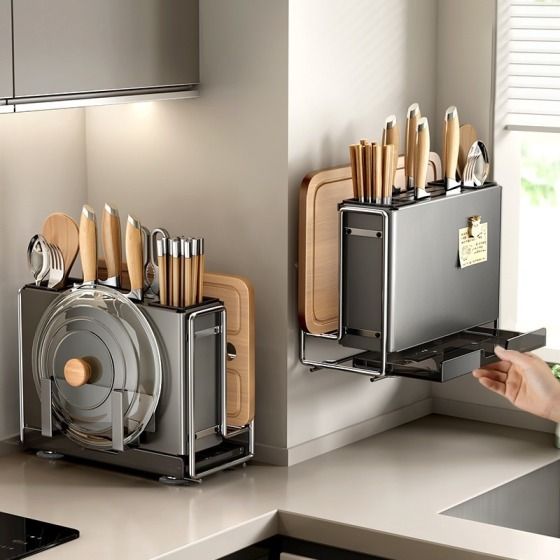
Your kitchen sounds like a drum solo every time you open the cabinet—lids sliding, clanging, and playing hide-and-seek just when the soup starts boiling over.
A wall‑mounted pot lid rack restores order, frees counter space, and reduces clutter, supporting better kitchen ergonomics according to ergonomic storage research.
🍳 Measuring Your Kitchen Space Before Installing a Wall Mounted Pot Lid Rack
Accurate measuring helps you pick a wall mounted pot lid rack that fits, stays safe, and uses every inch of space in a smart way.
Focus on wall width, nearby cabinets, and your cooking habits so the rack feels natural and easy to reach during daily use.
1. Measure Wall Width, Height, and Clearance
Use a tape measure to record wall width, height, and the space above stoves or counters. Leave room for lids to tilt when you remove them.
- Measure total wall width and mark center.
- Check distance from counter to cabinets.
- Allow 3–5 cm clearance on both sides.
2. Check Door, Drawer, and Appliance Swing
Open cabinet doors, oven doors, and drawers fully. Confirm the rack will not block movement or hit handles during daily cooking.
| Item | What to Check |
|---|---|
| Cabinet door | Opens fully without hitting rack |
| Drawer | Slides out without touching lids |
| Oven door | Has safe clearance when open |
3. Match Rack Size to Number of Lids
Count your lids and group them by size. Choose a rack that holds current lids plus one or two extra for future growth.
- Small lids: 14–18 cm
- Medium lids: 20–24 cm
- Large lids: 26–32 cm
4. Plan Vertical vs Horizontal Layout
Vertical racks suit narrow walls; horizontal racks fit wide, low spaces. Place most-used lids at chest or eye level for quick access.
🧱 Choosing the Right Wall Material and Fixings for Secure Mounting
Wall strength decides how secure your wall mounted pot lid holder feels. Identify the material first, then pick proper screws or drilling-free options.
This prevents wobble, protects tiles, and keeps heavy glass lids stable during daily use and cleaning.
1. Identify Your Wall Type
Check if your wall is tile, concrete, brick, or drywall. Tap the surface and listen: a hollow sound often means lightweight drywall.
| Wall Type | Notes |
|---|---|
| Tile | Use gentle drilling or strong glue pads |
| Concrete/Brick | Best for heavy, screw-fixed racks |
| Drywall | Use anchors or stud mounting |
2. Compare Drilling vs Drilling-Free Fixing
Drilling-free racks suit renters and tiled backsplashes, while screwed racks carry heavier loads. Choose based on lid weight and wall strength.
3. Choose the Right Hardware Set
Use wall plugs for brick and concrete, tile bits for tiles, and proper anchors for drywall. Always follow the rack maker’s load guide.
- Wall plugs for solid walls
- Toggle anchors for drywall
- Anti-slip pads to reduce vibration
4. Test Load Before Full Use
After mounting, hang a few heavy items and wait 24 hours. Check for movement before filling the rack with all your glass lids.
🫧 Selecting Rack Designs for Easy Cleaning and Daily Maintenance
Pick a pot lid rack with smooth, open design so you can wipe grease fast and keep your kitchen fresh and safe.
1. Prefer Open, Ventilated Structures
Open frames let steam escape and prevent water from staying on lids. This cuts down mildew and keeps handles dry and easy to hold.
- Wide gaps between bars
- No hidden corners or pockets
- Space for air flow around lids
2. Choose Easy-Clean Materials
Carbon steel with quality coating resists rust and wipes clean with mild soap. Avoid rough surfaces that trap grease and food dust.
| Material | Cleaning Ease |
|---|---|
| Carbon steel | Very easy, durable |
| Stainless steel | Easy, fingerprint marks |
| Plastic | Easy but less strong |
3. Look for Detachable or Modular Parts
Detachable racks let you remove trays or bars and wash them in the sink. This keeps long-term buildup under control with less effort.
🧂 Organizing Pot Lids by Size and Use for Efficient Cooking
Good organization helps you grab the right lid fast, keep counters tidy, and enjoy smoother cooking every day.
1. Group Lids by Pot or Pan Type
Store lids close to their matching pots or pans. This reduces searching and prevents mixing similar sizes during busy cooking times.
- Saucepan lids together
- Frying pan lids together
- Stockpot and wok lids together
2. Place Everyday Lids at Eye or Hand Level
Keep your most-used lids between waist and eye level. Put rarely used or spare lids on the highest or lowest rack levels.
3. Use Adjustable Slots for Mixed Sizes
Adjustable holders keep small lids from slipping and large lids from leaning too far out. Fine-tune slot width for each lid group.
| Slot Type | Best For |
|---|---|
| Narrow slots | Small glass lids |
| Medium slots | Daily pot lids |
| Wide slots | Wok and stockpot lids |
🏡 Why Wenhai Home Racks Offer Stable, Space-Saving Pot Lid Storage
Wenhai Home designs focus on stable metal frames, flexible mounting, and compact layouts that match modern kitchens and active cooking styles.
1. Stable Carbon Steel Frames
The Wall-mounted, drilling-free storage rack, detachable, made of carbon steel, lightweight and durable supports daily lid use while staying light and easy to install, even in small apartments.
2. Flexible Mounting for Renters and Owners
The Kitchen storage rack, double installation without nail glue/screw, kitchen finishing offers both drilling-free and screw options, so you can protect tiles or choose a permanent setup.
3. Multi-Function Storage for Lids and Tools
The Magnetic Knife Holder with Lid & Utensil Rack, Carbon Steel for Wall & Countertop combines lid storage with knife and utensil space, helping you free counter area.
Conclusion
A smart wall mounted pot lid rack starts with careful measuring and the right wall fixing. Match the rack design to your lids, wall type, and cleaning needs.
By choosing a stable, easy-clean carbon steel rack with flexible mounting, you save space, speed up cooking, and keep your kitchen safer and more organized.
Frequently Asked Questions about wall mount pot lid holder
1. How high should I install a wall mounted pot lid rack?
Install the rack so the middle row sits around chest level. This height makes daily lids easy to reach while keeping heavy glass above small children.
2. Can I use a drilling-free rack on glossy tiles?
Yes, if the tiles are clean, dry, and smooth. Press the adhesive base firmly, remove air bubbles, and wait at least 24 hours before loading lids.
3. How much weight can a wall mounted pot lid holder carry?
Most quality carbon steel racks hold 8–15 kg, depending on fixing type. Always check the maker’s guide and test with a partial load first.
4. How do I stop lids from rattling or slipping?
Choose a rack with shaped slots or add silicone pads to contact points. Group lids by size so each slot holds lids snugly without gaps.
5. How often should I clean a wall mounted pot lid rack?
Wipe the rack weekly with warm, soapy water in busy kitchens. Deep clean detachable trays or bars every one to two months to remove grease.
 Privacy settings