





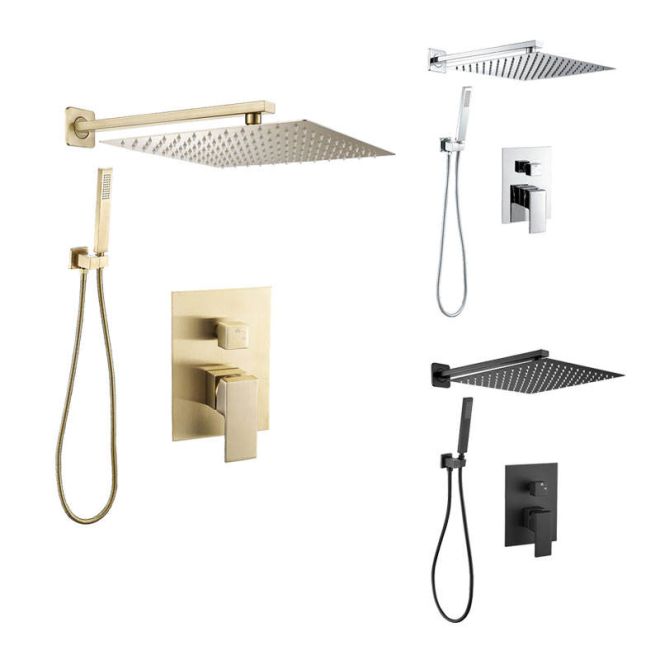
Every shower turns into a slapstick routine: juggling a fixed showerhead, bending like a yoga master, and still missing that one soapy spot on your back. Your bathroom feels less like a spa and more like a water fight.
Installing a hand shower set fixes this fast, giving you flexible water control and easier cleaning, as supported by EPA WaterSense research. Follow this step‑by‑step guide to upgrade your shower without calling a plumber.
🚿 Tools and Materials Checklist for Hand Shower Set Installation
A clear tools checklist makes hand shower set installation faster, safer, and cleaner. Prepare everything first so you do not stop halfway through the project.
This step-by-step guide works for basic hand showers and premium systems like the All-in-One Digital Constant Temperature Shower Combo with Simplified Piano Key - HS-1805.
1. Basic Hand Tools You Will Need
Gather simple tools before you start so you can remove old parts and fit new shower pieces without damage.
- Adjustable wrench and screwdriver set
- Drill with masonry or tile bits
- Measuring tape and pencil or marker
- Level for straight bracket mounting
2. Plumbing and Sealing Materials
Correct sealing stops leaks at threaded joints and around drilled holes, keeping walls dry and safe over time.
- PTFE (Teflon) tape for threaded joints
- Silicone sealant for wall anchors and escutcheons
- Rags or paper towels for quick cleanup
3. Safety and Surface Protection Items
Protect yourself and your bathroom surfaces while drilling, tightening, and routing hoses along the wall.
- Safety glasses and work gloves
- Drop cloth or towel for tub or shower floor
- Masking tape to mark drill spots on tile
4. Shower Set Components Check
Open the box and confirm all parts are present before you begin any wall work or plumbing changes.
| Component | Purpose |
|---|---|
| Hand shower head | Provides spray modes and flow control |
| Hose | Connects mixer outlet to hand shower |
| Wall bracket or slide bar | Holds shower at a comfortable height |
| Rubber washers | Seal hose and head connections |
🔧 Preparing Your Bathroom Wall and Water Supply Connections
Proper wall and water supply preparation prevents leaks, weak mounting, and costly rework. Take time to assess surfaces and valve locations first.
These steps apply to simple hand showers and advanced options like the Brushed Gold Shower Set, Concealed Rain System, Faucet Included, Bathroom.
1. Inspect Wall Type and Condition
Identify if your wall is tile, acrylic, or drywall before drilling. Check for cracks, hollow spots, or moisture damage.
- Tap the wall to find solid backing
- Avoid drilling near known pipes or wiring
- Repair loose tiles before mounting hardware
2. Confirm Water Supply and Shut-Off Valves
Locate main and local shut-off valves. Turn water off before disconnecting any old shower hose or outlet fittings.
| Check | Reason |
|---|---|
| Valve access | Quickly stop water if leaks appear |
| Hot/cold direction | Ensure correct mixing and safe temperature |
| Pressure level | Prevents hose strain or spray head damage |
3. Plan Mounting Height and Hose Path
Mark bracket height for the tallest user while keeping the hand shower easy to reach for all family members.
- Common bracket height: 150–180 cm from floor
- Keep hose clear of sharp corners
- Leave space for future upgrades or slide bars
4. Prepare Outlet Threads and Escutcheon
Clean existing outlet threads and wall plates so new seals sit flat and tight, reducing leak risk at the main connection.
- Remove old tape and mineral buildup
- Wrap fresh PTFE tape clockwise on threads
- Press escutcheon snugly against the wall
🧩 Mounting the Shower Bracket and Routing the Hose Correctly
Secure bracket mounting and smooth hose routing protect your wall, prevent kinks, and keep the hand shower easy to use every day.
Follow these steps whether you install a basic kit or a stylish system like the ABS, customizable color, outdoor showerhead, three-speed hand spray, portable camping showerhead.
1. Mark and Drill for the Bracket
Use a level and tape to mark holes before drilling, then install anchors suited to tile, stone, or drywall.
- Drill slowly to avoid cracking tiles
- Vacuum dust from holes for better grip
- Use stainless screws in wet areas
2. Fix the Bracket or Slide Bar Firmly
Align the bracket, tighten screws evenly, and confirm the mount does not wobble under hand pressure.
- Check angle for comfortable spray direction
- Do not overtighten and strip anchors
- Test with gentle pulls before use
3. Attach and Route the Hose
Connect the hose to the outlet and bracket side, then let it hang in a smooth curve without hard bends.
| Step | Tip |
|---|---|
| Fit rubber washer | Place flat inside each hose nut |
| Hand-tighten first | Avoid cross-threading metal parts |
| Check hose path | Ensure no kinks or sharp twists |
💦 Attaching the Hand Shower Head and Testing Water Pressure
Correct attachment and testing ensure steady spray, smooth mode changes, and long hose life with no annoying drips or noise.
Always finish with a careful pressure test at both low and high flow to confirm safe operation.
1. Connect the Hand Shower Head
Screw the hand shower onto the free end of the hose by hand, then lightly snug with a wrench if needed.
- Confirm washer is seated in the hose nut
- Avoid over-tightening plastic fittings
- Align handle for easy gripping
2. Turn On Water and Check for Leaks
Slowly open the valve and watch each joint. Wipe with a dry tissue to spot even tiny leaks quickly.
| Joint | What to Check |
|---|---|
| Wall outlet | No beads of water at threads |
| Hose ends | No drips after 1–2 minutes |
| Shower head | Only water from spray nozzles |
3. Test Spray Modes and Pressure Balance
Cycle through spray patterns while varying pressure. Make sure the flow stays even and the hose does not twist.
- Check comfort for rinsing hair and body
- Observe noise; whistling can mean high pressure
- Adjust mixer to avoid sudden temperature changes
🛠 Troubleshooting Leaks and Maintenance Tips with Wenhai Home Sets
Routine checks and simple fixes keep your hand shower running smoothly and help avoid sudden failures or water damage.
Wenhai systems are designed for easy care, so most issues can be solved with basic tools and a few simple steps.
1. Fixing Common Leaks
Most small leaks come from worn washers, loose nuts, or old tape. Inspect these parts first before replacing hardware.
- Re-seat or replace rubber washers
- Re-wrap threads with fresh PTFE tape
- Tighten nuts gently in small steps
2. Cleaning and Descaling the Hand Shower
Mineral buildup can block spray holes and reduce flow. Regular descaling keeps the spray strong and even.
| Action | Frequency |
|---|---|
| Wipe chrome surfaces dry | After each use if possible |
| Soak head in mild vinegar mix | Every 1–3 months |
| Check hose for cracks | Twice per year |
3. Long-Term Care and Upgrade Ideas
Plan upgrades when you see wear or want better comfort, such as digital control, constant temperature, or richer spray modes.
- Inspect mounts and anchors yearly
- Consider replacing old sets with Wenhai thermostatic systems
- Match finishes and style for a clean bathroom look
Conclusion
A careful hand shower installation starts with planning, correct tools, and patient testing. Step-by-step work reduces leaks and protects your bathroom walls and fixtures.
Maintain the set with simple cleaning, regular checks, and smart upgrades. This keeps your daily shower comfortable, safe, and efficient for many years.
Frequently Asked Questions about bathroom hand shower set
1. Can I install a hand shower set without a plumber?
Yes, many sets are DIY-friendly. If you have solid walls, basic tools, and working valves, you can usually install them by following clear steps.
2. How high should I mount the hand shower bracket?
Most people mount the bracket between 150 and 180 cm from the floor. Adjust for the tallest user while keeping it reachable for children or seated users.
3. Why is my new hand shower leaking at the hose joint?
Leaks usually mean a missing or twisted washer or loose nut. Turn off the water, re-seat the washer, wrap threads if needed, then hand-tighten again.
4. How often should I descale the shower head?
In hard water areas, descale every one to three months. Soak the head in a mild vinegar solution, then rinse and wipe the nozzles clean.
5. Can I upgrade from a basic hand shower to a thermostatic combo later?
Often yes, if your plumbing layout supports it. Check wall space, valve access, and water pressure before upgrading to a digital or thermostatic combo system.
 Privacy settings